The inside views are:
I have made some dividers for the Parisian DayDream journal, I need to make some for my journal next:
These journals were made using manila file folders and the long post that follows is a picture tutorial on how to make your own journal. If you do not understand some of my instructions, please let me know:
I gathered 2 used manila file folders and a piece of cardboard that I had in my stash. I also pulled out 3 pieces of 12 x 12 background paper. For my projects I used paper from The Paper Studio - the Classic Paper Collection. I liked that the paper was lightweight, so it was easier to fold around the folders.
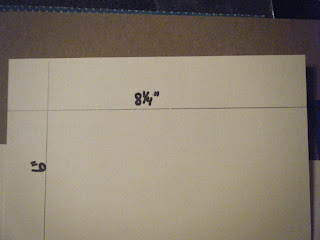
I cut both folders 6" from each side of the center folds which measured 3/4". The height of the folder was cut at 8.25".
I then measured about 1.75" from the top and bottom of the center edge to punch holes down both sides of the folds for the binder rings.
Next I cut 2 pieces of cardboard 8.25" by just shy of 6" to leave room for the punched holes.
I used glue to tack down the cardboard pieces to the bottom file folder.
Next I put glue on the cardboard and laid the interior file folder on top of it.
I put clamps on the folders and then laid a package of cardstock and my cuttlebug on top of it to keep everything pressed together.
After it dried, I started the fun part. The light colored background paper was cut into 2 pieces of 6 by 12.
I applied adhesive to the outside of the folder and centered the paper lengthwise, but left about an inch on the outside edge, enough to fold over to the inside of the journal. Fold over ends, too.
After finishing both ends of the journal, cut a second piece of matching cardstock 5 by 8.25 to layer on the inside of the journal.
To finish cut a piece of contrasting background paper 4.5 by 12. Center on the fold of the journal on the outside. Adhere and fold over to the inside.
Another piece needs to be cut at 4.5" by 8.25" to cover the inside center. Next make sure to poke holes through the background paper where punched out in the folders. Add the binder rings to the journal at this time.
To make the flap to close the journal, cut one piece of the manila folder 2" by 4.5". Use a corner rounder on one end.
Cut 2 strips of the dark background paper to cover this piece of folder. Attach to back center of the journal. Wrap the piece around to the other side of the journal and place two velcro pieces to the front of the journal to hold the flap closed.
Now the fun part begins!! I used papers from the Parisian DayDream Printable Journal Kit designed by Tsunami Rose Designs to decorate.
To make the dividers for the inside, I took a 8.5 x 11 piece of white cardstock, scored it in the center and folded to 8.5 x 5.5. I trimmed .5" off the end to make the piece 8" x 5.5". I inked the edges on both sides and then adhered decorative paper and tabs to the cardstock and punched holes to line up with the binder rings.
Here's another look at the journals:
Thanks for sticking it out to the end! Enjoy making your own journals!


 I
I 


Stephenie, Parisian Daydream by Tsunami Rose Designs is probably my favourite printable journal kit in the whole wide world! You've done a fantastic job making this journal and your instructions are so clear. Thanks so much for this new-to-me take on making a journal using file folders. Love it!
ReplyDelete