This is a scale drawing of this side of the unit:

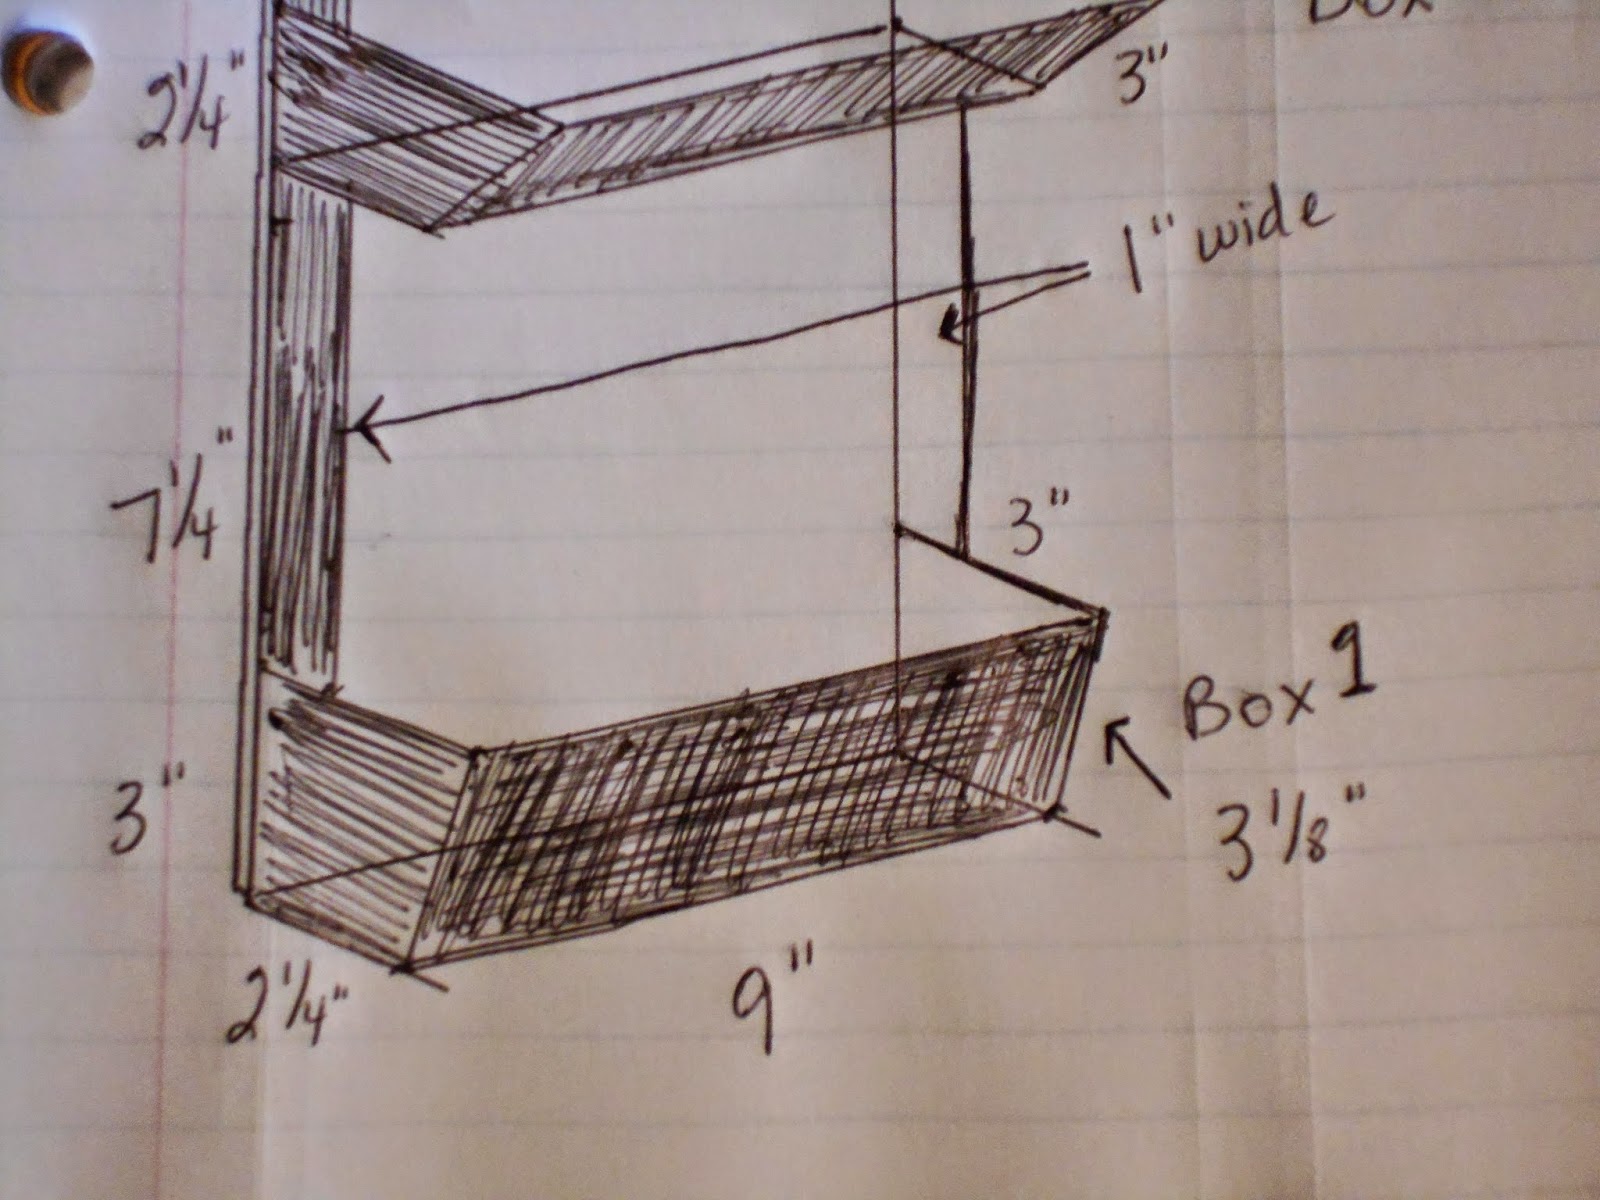

I labled the bottom box as #1 because that is where you start construction and then work your way up. So first you need to cut the foam board into the pieces needed.

These drawings are the actual sizes, but make sure to double check the length of your diagonal on each piece because that is the measurement used to make the piece across the front of your box. It is not a disaster if the piece is a little long or short, too much will mean your items will not stay in, but otherwise it will just be a visual difference.


You cut 4 of these because the top 2 boxes are the same size.
I can hear a few of you saying that the above drawings are going to be difficult to cut out of foam board. How do I know this? Because I was not sure how I was going to make these come out right and hopefully, I am not the only one scratching my head. So, for those people like me, I want to show you how I made those cuts.

What worked for me was to cut a strip of the foam board the height I needed. For the first box it was 3 inches tall. Next, I measured 3 inches across the top and 2 1/4 inches across the bottom and connected the points. In this picture I measured again on the opposite sides and drew the line. What I really did on the second piece is cut out the first piece, lay it on the foam board with the diagonals matching and cut the straight line. That way I knew the pieces matched.

The rest of the pieces are 2 1/4 inches tall, so I again drew out the first measurement for Box 2, cut it out, laid it on the foam board to cut out the second piece needed.

Using the same piece of foam board, I drew out the side for Box 3, cut it out and then cut out 3 more pieces to complete the sides of Box 3 and 4.

The next step is to cut out the 1 inch pieces that are used for support of the boxes.

NOTE: On the above picture, the length should be 9 inches, not 8.5 inches!!!! I just caught this as I was writing the tutorial.
If I was putting the sides up first, this would be correct, but we are starting with the bottom, so it has to be the width of the Base. Sorry for the confusion on this!!

I only drew out one of the front panels to cut because you really need to measure the length of the diagonals on your side lengths to make sure you get this width correct. There will be 4 of these pieces.
Finally, the construction part. You need your glue gun, the packaging tape, and some water to activate the tape.
Box 1: The bottom piece is 9 inches by 2 1/4 inches...hopefully you caught my correction of the length above. Put hot glue on the edge of the 9 inch side of the foam board. and attach to the bottom edge of the base, lining it up so the bottom of the box is even. This process is just like you did in Part 1, but we are starting at the bottom of the Base instead of the side. Adhere the packaging tape on both sides of this piece to secure it to the base. Next put hot glue on the edge of the side piece, but only on the back and bottom edges. Place it in the 90 degree space on top of the bottom piece at the left or right edge of the base.


I hope the above pictures help you see the alignment better. Secure the edges with the packaging tape. Next, hot glue the front edges of the box to attach the front piece or place the glue in a U shape on the front piece to attach it to the sides and bottom of the box, whichever is easier for you.
Your first box is complete. You next attach the 1 inch support pieces to the back edge of the box and the Base and secure with packaging tape.
The bottom of Box 2 is hot glued to the 1 inch support on both sides and the Base. Secure with the packaging tape and finish Box 2 the same as Box 1.
Repeat this process with Box 3 and 4.
Decorate with design paper.
No comments:
Post a Comment